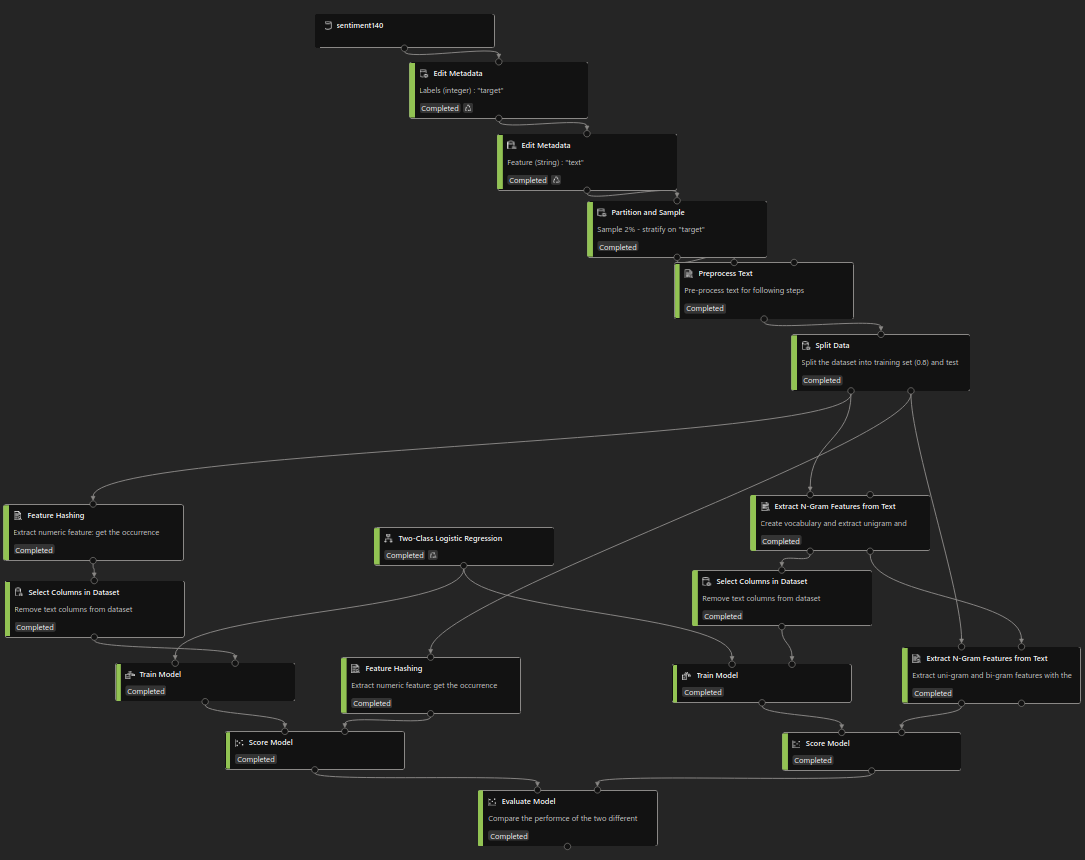
Results
The test dataset goes through the same text pre-processing and vectorization steps as the training dataset, before being used to test the model.
| Model |
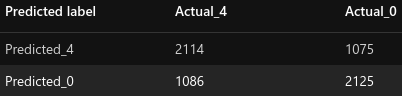
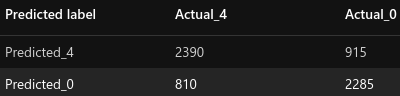
Confusion Matrix |
AP |
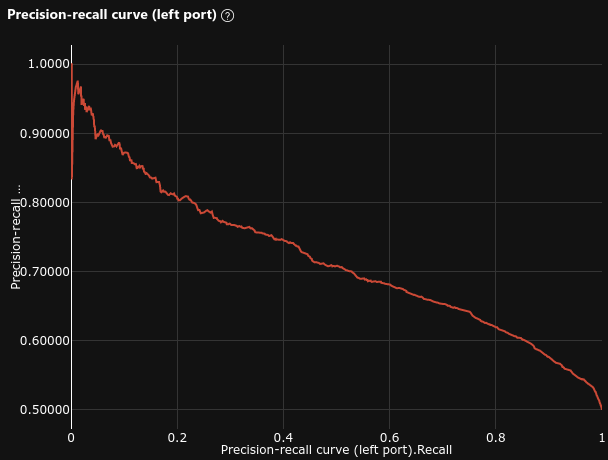
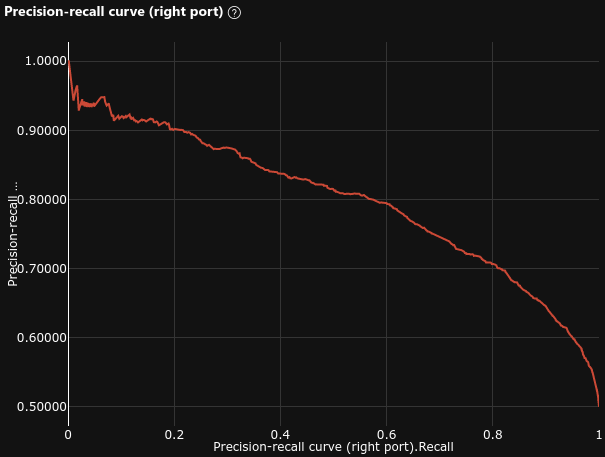
Precision Recall Curve |
ROC AUC |
ROC Curve |
| Feature Hashing |
 |
0.663 |
 |
0.726 |
 |
| N-Gram Features |
 |
0.723 |
 |
0.811 |
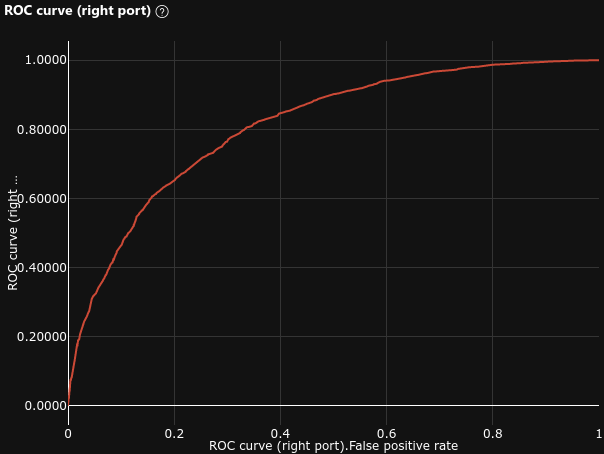 |
We can see that the N-Gram Features model performs better than the Feature Hashing model.
The performances on the dataset are similar to our baseline model :
- Average Precision = 0.723 (baseline = 0.73 , -1%)
- ROC AUC = 0.811 (baseline = 0.74 , +9.6%)
Unlike our baseline model, this model is quite balanced, just slightly biased towards the POSITIVE class. It is much less biased than our baseline model : it predicted 6.8% (baseline = 35% , -81%) more POSITIVE (3305) messages than NEGATIVE (3095).